
I took these photos a couple of weeks ago and I like them but I wasn’t really sure what to say about them. These are photos from an outing that I made to the national fish hatchery close by. There are many ponds that attract all sorts of different birds. I went out there to practice shooting birds and since it was a bright sunny morning, I figured that I could get away with using a teleconverter.
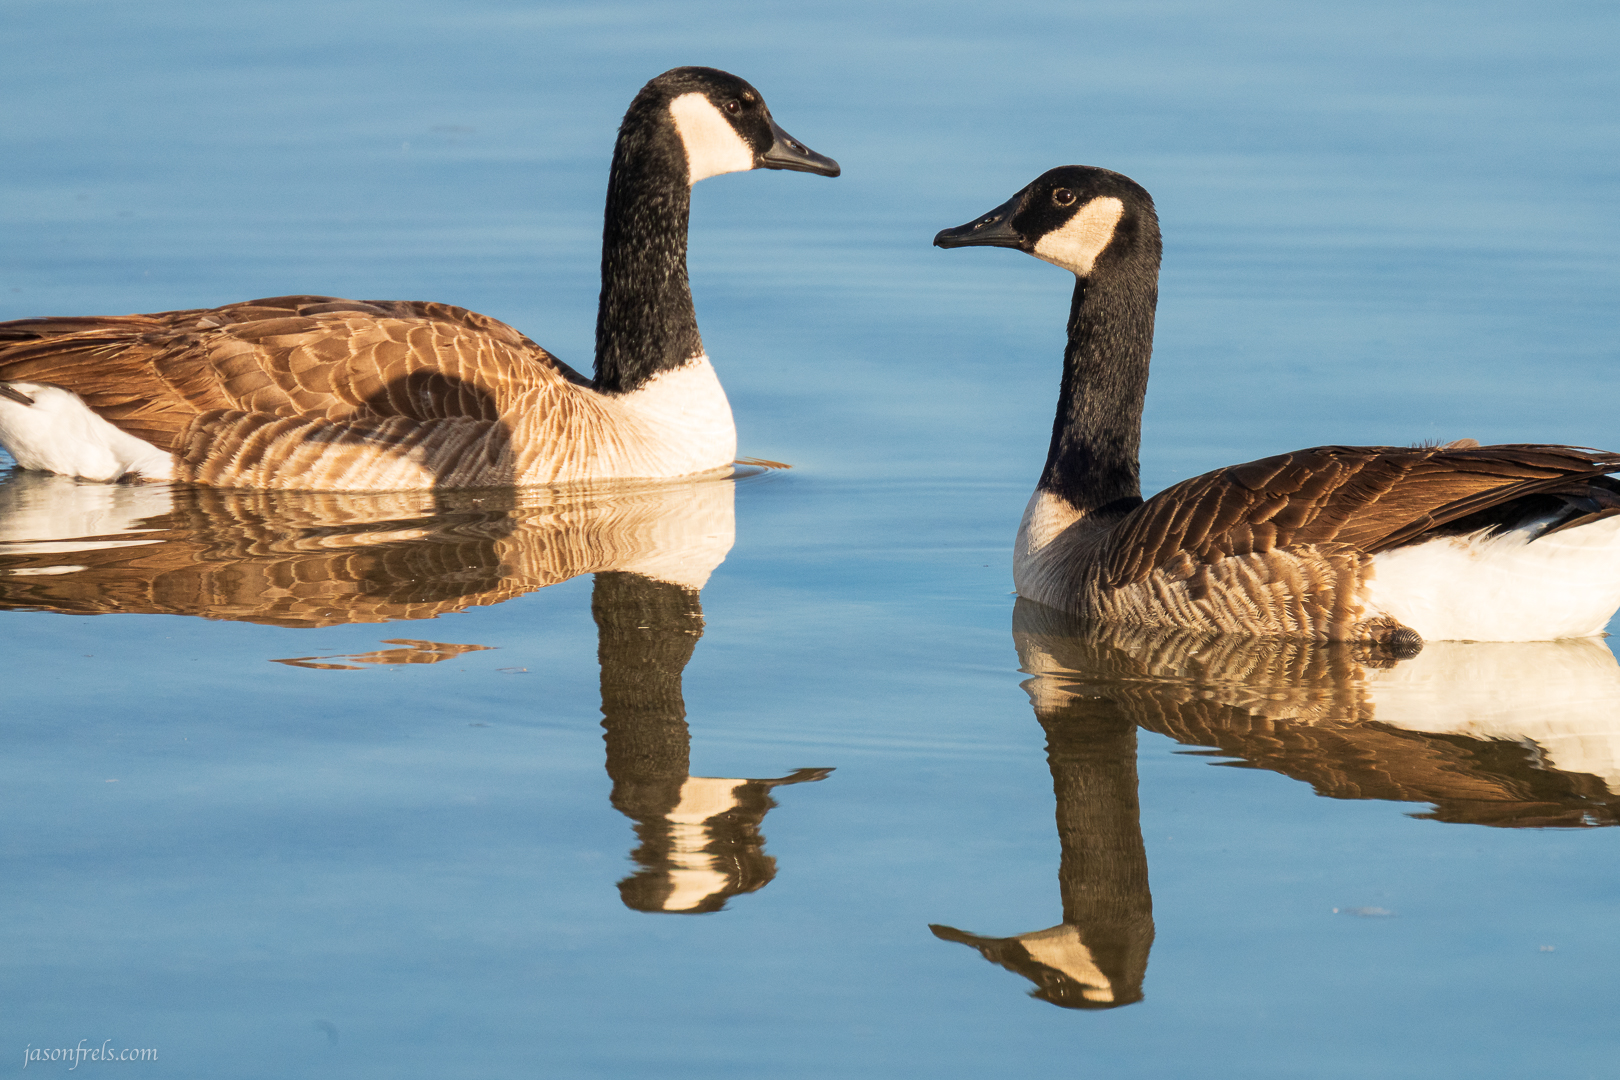
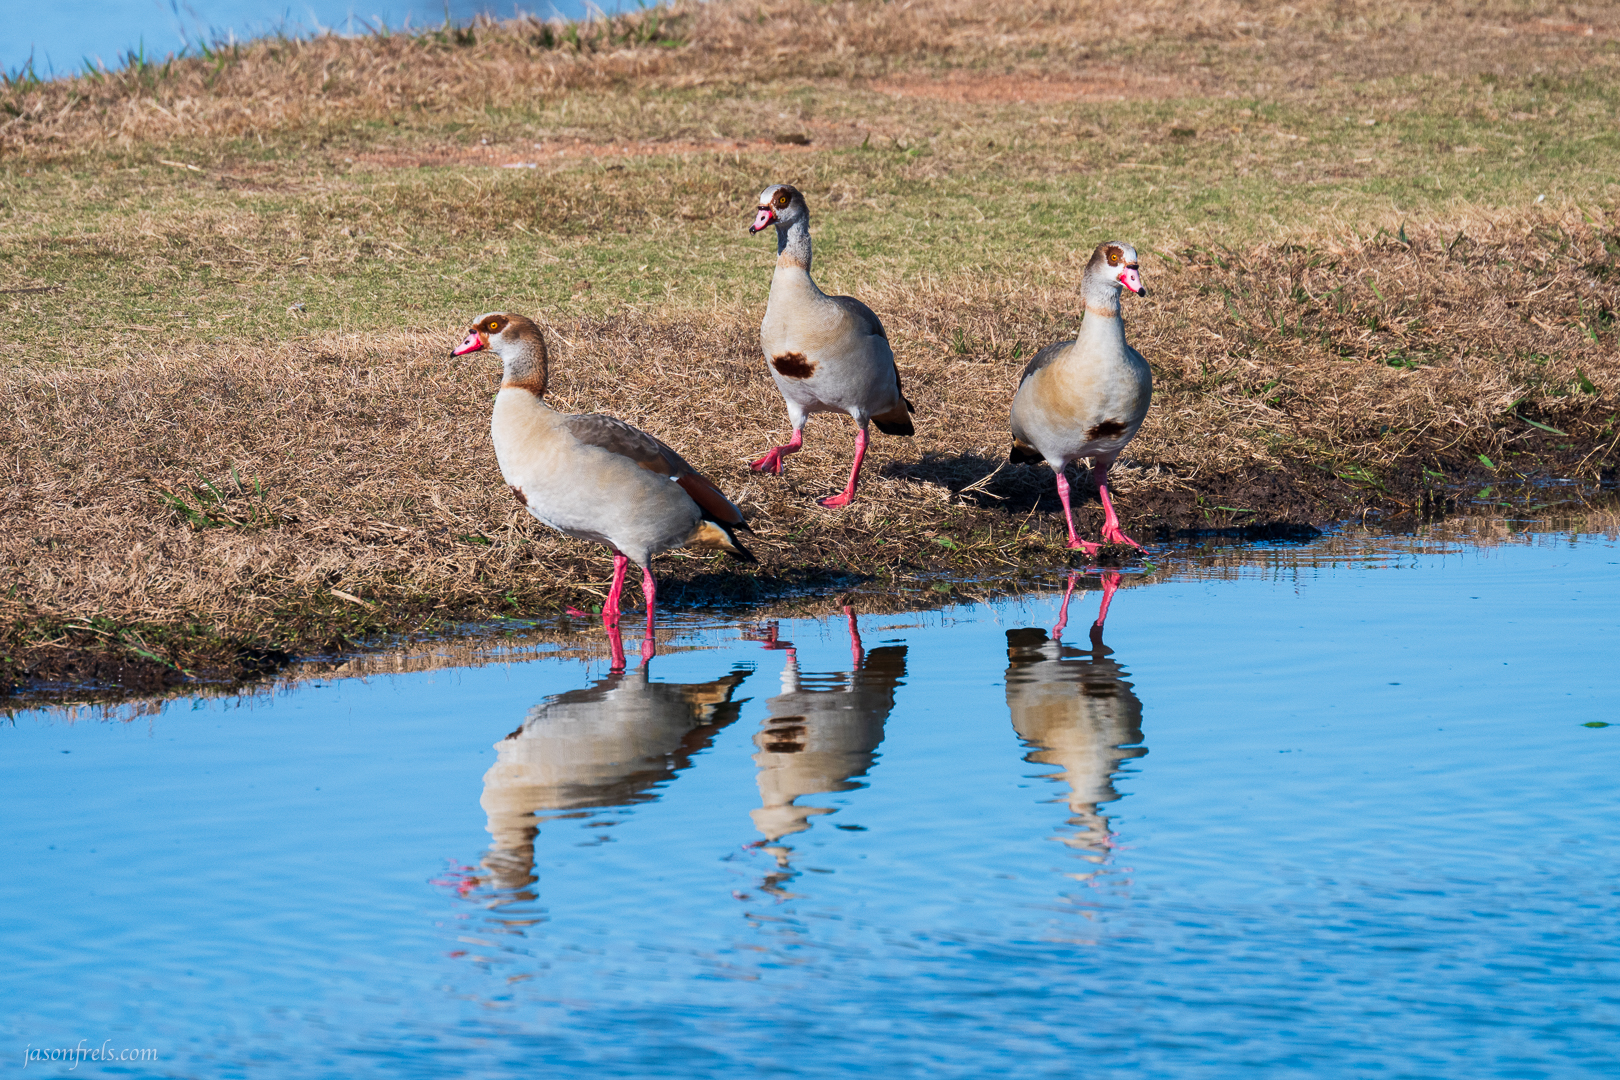
A teleconverter is a device you put between your camera and lens which increases the focal length. It is handy when your lens doesn’t have quite the reach that you need. The above image of the Canada Geese was shot with a 100-400mm f/4.5-5.6 lens + 2x teleconverter. This gives me an 800mm focal length on the long end. It allowed me to get really good shots of the geese from a distance as they didn’t really want me to get too close to them. Notice the aperture and ISO I used.
The downside of using a teleconverter is that it reduces your effective aperture, and thus the light you have to work with. In the case of a 2x teleconverter, it takes 2 full stops off of your lenses maximum aperture. So, while the 100-400mm f/4.5-5.6 lens will shoot at f/5.6 at 400mm, with the 2x TC attached its maximum aperture is f/11 (apertures get smaller as the f-number increases). To pay for this reduction in light you either have to lower the shutter speed or increase the ISO. Shooting wildlife, you need a fast shutter, so that leaves ISO. And as you increase ISO, you increase the noise in the image. So a teleconverter is generally at odds with shooting wildlife. What can you do about that?
The way to have a fast shutter speed and keep your ISO down is to add light. At an outdoor location like this I can’t very well walk around with a massive flash on the camera, so I have to rely upon the sun. Which gets me back to my statement about thinking I could get away with using the teleconverter as it was a bright sunny morning. There was so much sunlight that I was able to keep my ISO values between 800 and 1600, which in good light can certainly give you good images. When shooting wildlife, I am generally shooting in manual mode with auto-ISO so I select the aperture and shutter-speed I want and let the camera metering figure out the necessary ISO.
Another tool that you can use to counteract the noise from shooting at high ISO is use noise reduction and sharpening tools on your images when you process them. You can take images that have lost a little sharpness and gained a little noise from the higher ISO setting and the tools are generally good at finding edges and figuring out what is and isn’t noise. The osprey in the photo below was sharpened up a bit in Lightroom and then processed with the noise reduction tool and I think it turned out well. The darker areas on the underside of the wing have a lot of good detail. It was also nice that this osprey circled above my head several dozen times to give me practice tracking and shooting it.
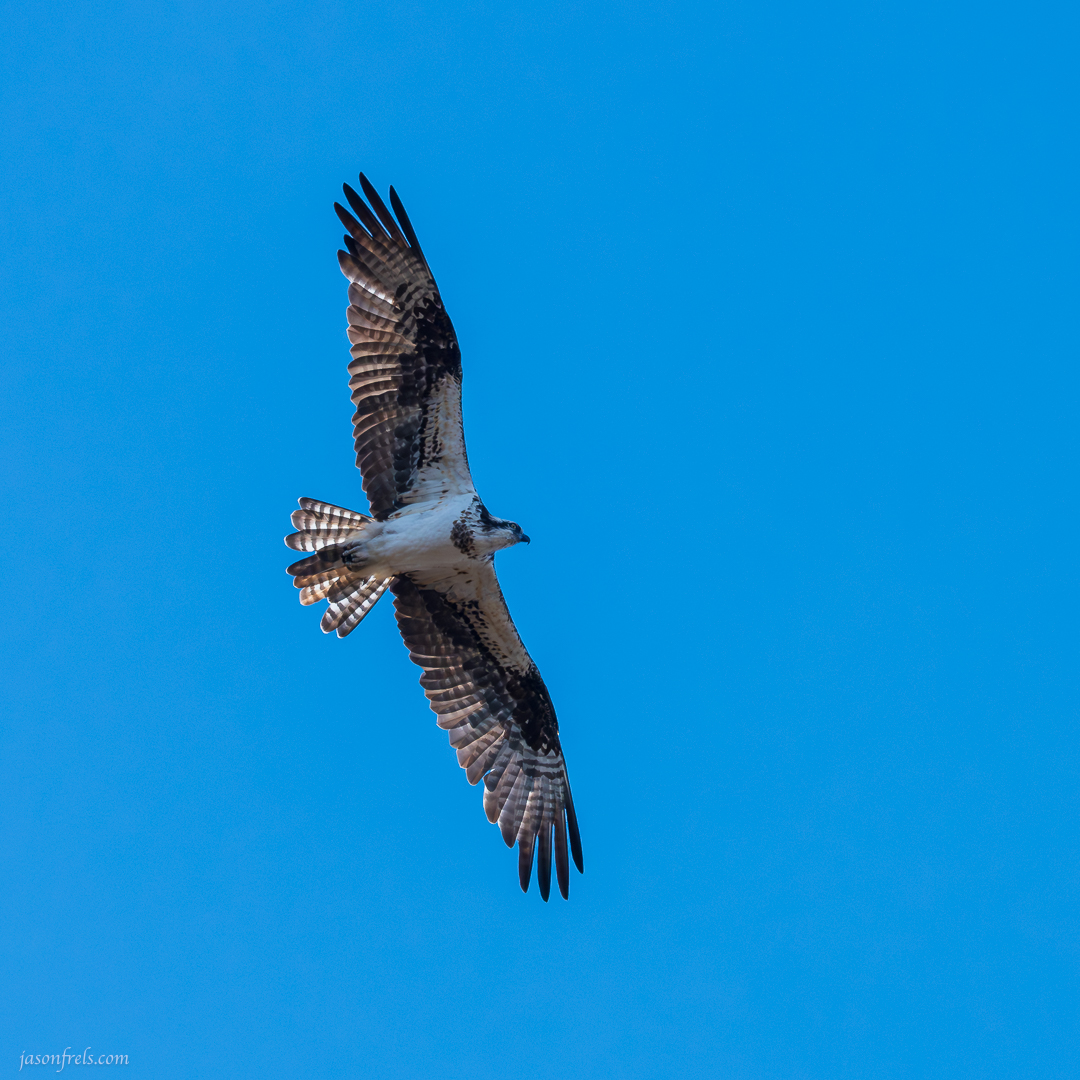
On cloudy days or when it is close to dawn or dusk, the teleconverter will force you up into the 5-digit ISOs and you will lose a lot of detail and color information to the noise. You can try to rescue these images with the noise correction tools but I find that they end up looking plasticky as the tool doesn’t have enough texture to work with. But if it is a key moment, a noisy image is better than no image I suppose.
A teleconverter seems like a cheap and easy way to increase the reach of your lens, and it is, but you do pay a penalty in light gathering capability. So, unless there is plenty of sunlight, I don’t even bother with the teleconverter. And Nikon does offer an 800mm f/6.3 lens that cost more than twice what my 100-400mm lens and teleconverter costs, but it does get nearly 2-stops more aperture. Maybe some day.

Yep, those are pretty high ISOs. I like your detailed explanation about apertures and ISOs. It reminded me of some photography concepts I had forgotten. I think it’s pretty fortunate there are processing tools available that can help mitigate the effect of noise.
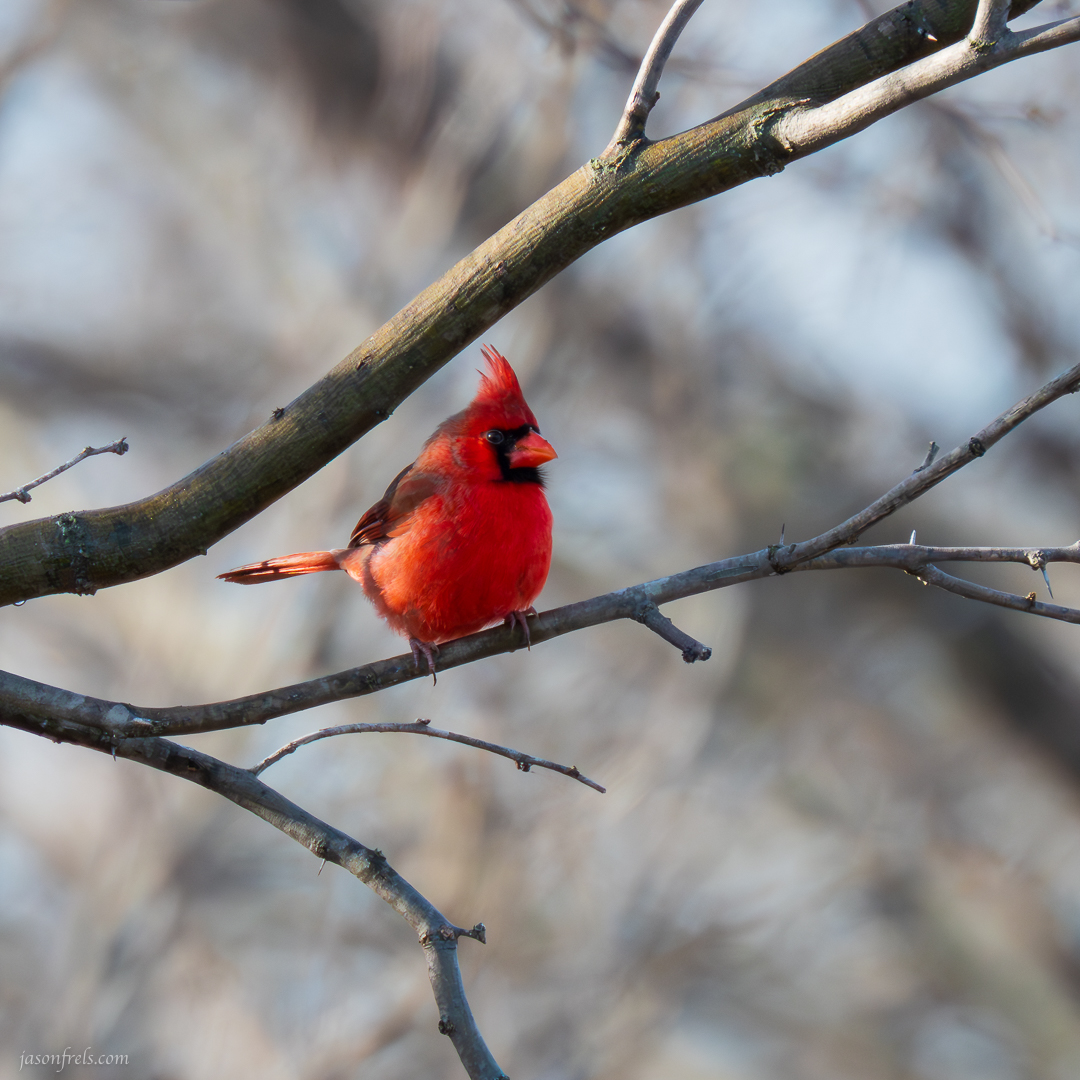
Beautiful photos. I like the cardinal best, just for its colorfulness.
LikeLiked by 3 people
The photos weren’t terribly noisy to begin with. It is nice to make them cleaner though. I am comfortable up to about ISO6400 and then it starts affecting your sharpness and color noticeably.
LikeLiked by 1 person
That’s nice to know. That gives you a lot of leeway, using your teleconverter.
LikeLiked by 1 person
Nice pics, Jason. The lens I have is a constant f/4.5 but decreases like yours when using teleconverters. I always have them with me. Depending n the situation I may or may not employ them but most times I might use one or the other. If my subjects will be stationary, waterfowl floating included, I will use a lower ISO and shutter speed. Even small birds in bushes. It’s nice to have options. Personally, on some of your pics, I would have saturated the reflections more and then in post brought back details in th subject itself. Years of shooting slides for publications. Keep pushing yourself. The birding will follow. 😎🫣😁😏
LikeLiked by 1 person
I think one of the oddities about editing is that my monitor may be more saturated than the viewers, or cooler or warmer. Who knows? Monitors are often quite different. So, I may see it as very saturated and a viewer might see it as less saturated. Not sure what there is to do about that.
Sometimes I will mask the reflection and boost the dehaze to bring it out. I don’t remember if I did that here.
Thanks
LikeLiked by 1 person
Ceilings and Floors, ceilings and floors. Everyone “sees” differently which makes it a wonderful world, photographically speaking.
LikeLiked by 1 person
Almost missed these, but the day isn’t over yet! Someday, I will find your blog post before Tippy. How does he always manage to be the first one. LOL!
Great shots of wildlife, and you describe your techniques very well. You could start a YouTube series about photography. 🙂
The osprey is my favorite. It’s a perfect shot of its wingspan.
Always love seeing bright red cardinals, too.
LikeLiked by 2 people
I do some photography, too. And that enables me to zoom to his posts before you.
LikeLiked by 2 people
LOL, PUN-ster!
LikeLiked by 2 people
I noticed that you do some photography. Yep, I can tell-a-photo when I see one.
LikeLiked by 1 person
That was a snappy reply.
LikeLiked by 2 people
🤦♀️! Aren’t you clever
LikeLiked by 1 person
I ring my cowbell every time I make a post hoping you’ll hear it.
LikeLiked by 1 person
Try ringing it a little louder next time. If you didn’t see purple smoke, it wasn’t loud enough.
LikeLiked by 1 person
Maybe that new dog you have will bark when she hears it and get you to come out from under all those throw pillows.
LikeLiked by 1 person
I have more blankets on me than throw pillows, smartie!
LikeLiked by 1 person
you have explained the technical bits very well, so that a lay person can understand -well done.
LikeLiked by 1 person