
Lately I have gotten in to HDR photography. I started out with just some simple bracketing of sunsets and experimenting with indoor shots. The sunset shots came out OK, but not as dramatic as I had hoped. So, I took a class and began practicing with some software called Photomatix and started getting better results. So, I thought I’d write what I know about this.
First, what is HDR photography? HDR stands for High Dynamic Range and is a process that is used to produce images of subjects that may have high contrast. DSLR cameras do not have near the dynamic range of the human eye and so with subjects that have very bright areas and very dark areas, generally either the light areas will be over exposed by the camera so the content in the darker areas shows up or the darker areas will be underexposed so that the lighter parts of the image have detail. HDR photography accounts for this problem by combining several images of varying exposure to produce an image that show shadows and highlights.
You might like to use HDR in a scenario with a very bright light source, like the sky or lit areas at night, and in which you also want to see details that are in the shadows. This can also be used to enhance pictures taken inside of a building as there are often bright windows dominating the scene resulting in the interior features being hidden in shadow.
To make an HDR image you will need multiple images of a subject at different exposure. This can be done manually, but many modern DSLRs have a feature called bracketing which instructs the camera to automatically vary the exposure by set stops. This is best done in aperture priority mode so that the focus point and focus depth remain unchanged. The camera will vary the exposure by adjusting the shutter speed. It also a good idea to use a tripod so that frames align. Bracketing on my camera allows me to take 3 pictures and vary the exposure by up to +2 and -2 stops. But this may not be enough to capture all of the information that you need, so you may need to manually adjust the shutter in between each picture and take several pictures. You will use progressively faster shutters, adjust by a stop each time, until the brightest areas are not overexposed and progressively slower shutters to capture the darkest parts of the image.
Automatic Bracketing
In some scenes, the automatic bracketing may be enough to get the images that you need and it is much quicker than doing all of this manually. With the Nikon D5300, you enable bracketing in the camera menu and select the range of exposure brackets (±0.7, ±1.0, ±2.0, etc). Then set the camera for the aperture and focus that you want and take three pictures. The first picture is a normal exposure (unless you set exposure compensation to some other value). In the second picture, the exposure is reduced by the offset set in bracketing. In the third picture, the exposure is increased by the offset set in bracketing. If you look at these images and see that not enough dark or bright data was captured, you will have to go to manual mode and adjust the shutter by stops until you have enough data.
Manual Bracketing
In manual mode, you control the exposure with the shutter speed setting. I usually start in Aperture Priority mode with ISO100 selected, take a shot and look at the histogram. I then switch to Manual Mode using the first shot as a starting place for my aperture and shutter setting. I look at the histogram and if there are areas underexposed, I decrease the shutter speed by a stop, basically doubling the duration of the exposure. With all other settings unchanged I take another picture and look at the histogram and keep decreasing the shutter speed in one stop increments until the left most part of the histogram has no data. Then, I go back to my starting point and increase the shutter speed by a stop, take a picture, and look at this histogram and check to see if anything is overexposed. If so, increase the shutter speed by a stop and repeat. At this point, I should have enough data to make an HDR image.
The Histogram
The best way to tell if you have enough data is to inspect the histogram on the back of the camera. An image that has captured all of the bright data will have no data on the extreme right of the histogram. An image that has captured all of the data in the dark areas will have no data on the far left of the histogram.
In the first histogram below, the image captures the detail in the extremely bright areas of the seen (right end of histogram) and all of the dark data is compressed to the left of the histogram and are too underexposed to work with. In the second histogram below, the image captures detail in the darkest parts of the scene (left end of histogram) and the brighter parts of the scene are too overexposed to work with (piled up at the right end of the histogram).


As an aside, the histogram data on the back of the camera is taken from the JPEG rendering of the image rather than the RAW data, so it won’t be entirely accurate as the RAW will have more data, but it is what we have to work with and the only risk is taking one or two unnecessary exposures.
The Photo Shoot
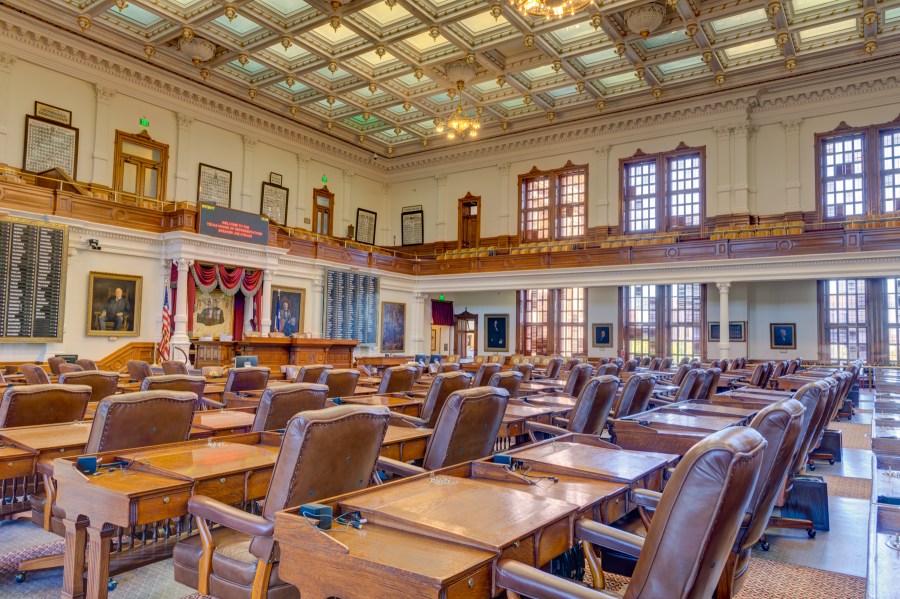
The following images were taken in the Texas state capitol building House of Representatives chamber as part of an HDR class that I attended. In this scene there is a great deal of contrast between bright and dark, so it makes a great place to practice HDR photography. I mounted the camera on a tripod and selected manual mode. I set the camera to ISO100 and RAW to capture the highest quality image, I set the aperture to f8 for a good focus depth, I focused the image and took photos with varying shutter speeds until I had captured all of the dark and light data available, checking the histogram after each image.
The eight images below show varying amounts of exposure by adjusting the shutter from 1/30 seconds to 13 seconds. In the dark images you can see detail in the windows and ceilings, but the chairs and furniture are too underexposed to see any detail. In the light images, you can see a lot of detail in the dark chairs and furniture, but the windows and ceiling are blown out.


Now, I had a memory card full of images and it was time to head for the computer for processing.
Post Processing
After capturing these images, I imported the RAW files onto my computer for processing. The processing tools that I used were Adobe Lightroom and Photomatix. The first step I performed was importing the RAW files into Lightroom and applying the lens correction filter to correct for distortion, vignetting, chromatic aberrations, etc. You can also check the RAW histograms in Lightroom and perhaps reduce the number of images to process if you have more than enough exposures. I then selected all of the images that wanted in Lightroom and exported them to Photomatix for HDR rendering. Photomatix has a de-ghosting feature that you want to use if there were things that changed from picture to picture, like people walking around. After this is done, Photomatix has several presets and allows you to adjust the amount color saturation, contrast, etc. There are too many setting to go through here, but you can make a very natural looking image or a saturated, perhaps artistic image. I was going for a natural looking image, so I tried to match human eye perception to the best of my ability. When finished in Photomatix, the image can then be imported into the Lightroom library, where you can make fine tune adjustments, crop, rotate, etc. and then produce the finished JPG. The image below is my final product. Notice that you can see the buildings outside the windows and the chairs and desks.
One particularly difficult challenge that I faced with this image was adjusting the white balance. This was a clear day at around noon, so there was a lot of sunlight coming in through the windows, but there was also interior incandescent lighting. The human eye and brain can easily adjust all of this so that we see white as white, but a camera just captures light. This left me with the choice of white balancing for daylight or the interior lighting. Setting the white balance for daylight leaves the interior, especially the walls, looking very yellow. White balancing for incandescent lighting makes the areas lit by daylight, especially the chairs and carpet, appear very blue. I adjusted mostly toward the daylight white balance as I found the yellow walls more appealing than blue chairs and carpet.
Sunsets
Another subject that I like to use HDR for is the sunset. When the sun sets, the sky will be full of bright warm colors that overwhelm the landscape. If you want to capture all of the rich colors in the sky, you will need to use a low exposure which will probably leave the landscape very under exposed. When you expose for the landscape, the sky will be blown out and white.
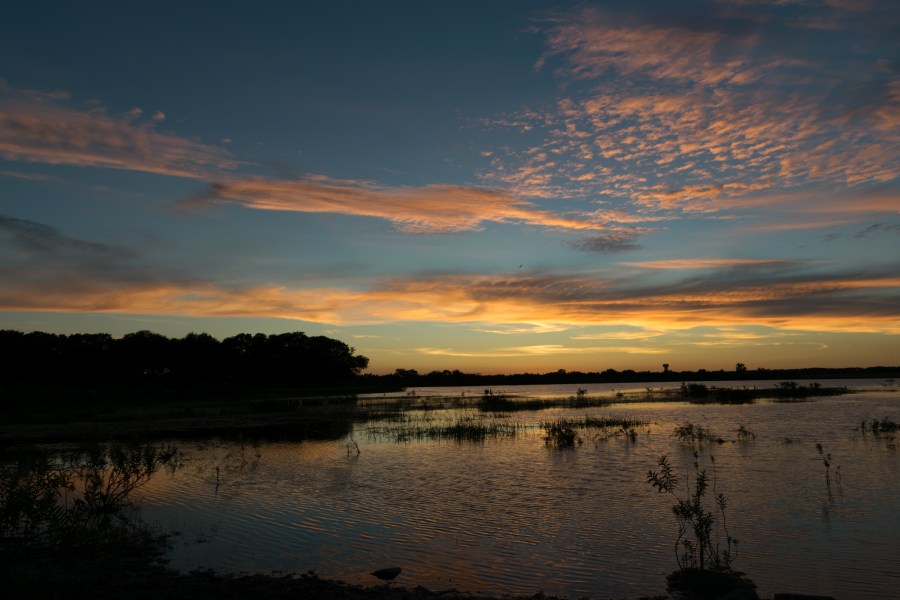
In the picture below, the sky is exposed well showing the deep blue sky, the orange and yellow clouds lit from underneath by the sun below the horizon, and the reflections in the lake. However, the tree line is just a dark silhouette without detail.
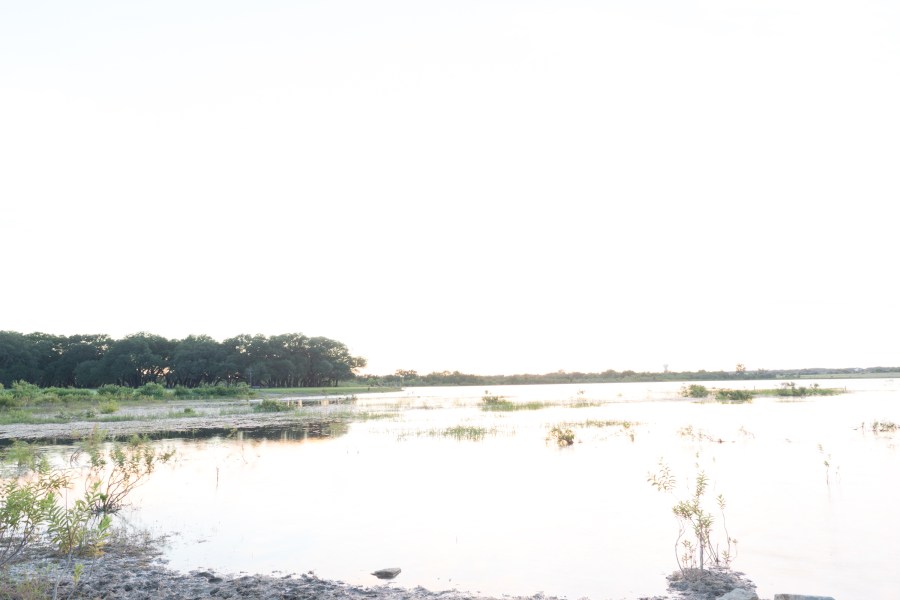
In the next picture, you can clearly make out the detail of the plants in the foreground as well as the trees and grass across the lake. But the sky and the lake are completely over exposed and almost white with no detail.
So, taking this pictures and several exposures separated by shutter stops in between we can merge the photos to get all of that information in one image. Hopefully, this looks more like what the eye sees.

Some of the issues that you may have to deal with are ghosting and color saturation. If the trees or clouds are blowing in the wind, they will appear a bit blurry unless you spend a lot of time attempting to de-ghost them. I decided that I didn’t mind the foreground plants being a bit wispy. Also, the sky at first ended up being very orange and I had to go back in to Lightroom and dial the orange saturation down quite a bit. You can also use HDR to make very artsy images with oversaturated colors, but that was not what I set out to do.
That’s my current take on HDR. I find that attempting HDR images is quite addictive and spend a lot of time bracketing my photos now. In the future I would like to try rusty vehicles or machinery or perhaps poorly lit interior scenes. Thanks for reading.

[…] way to compensate for this, you may remember from an earlier blog, is to use HDR techniques. This involves taking multiple exposures of the same subject at various […]
LikeLike
[…] HDR Photography […]
LikeLike
[…] HDR Photography […]
LikeLike