
There is a stone gazebo at an overlook at Bastrop State Park and I hurried to try to get there at sunset one evening and arrived just as the sun was hitting the horizon. I noticed that I could get the sun to be right through the openings in the gazebo and tried shooting that. I knew that I would need several images to merge as there was too much contrast between the sky and the gazebo in the foreground. So I fired off several bracket images to deal with later.
Ordinarily, I would merge the images by using the HDR merge tool in Lightroom, which makes a reasonably good image, but it can leave things looking a bit over-cooked. So I decided to try a technique that I had seen someone do on YouTube which involved loading the various images as layers in Photoshop and masking based on luminosity to merge the images into one final image for editing. This will allow me to have good image data in the shadows as well as the brighter areas of the image. My Photoshop skills are pretty weak, so this involved quite a bit of fumbling around on my part, but I managed to get an image.
I started with four images that were at 2-stop increments from dark to bright. They were shot at 55mm, f/6.3, ISO100 and shutter-speeds of 1/400s, 1/100s, 1/25s, 1/6s. In shutter-speed terms, a stop is a doubling or halving of the time that the shutter is open.


The first step was to adjust the exposure levels of each image in Lightroom so that they were all equal. The darkest image I raised by 3ev, the next I raised by 1ev, the next I lowered by 1ev, and the brightest I lowered by 3ev. Now each image has the same exposure but they still have good detail in different parts of the images.
I then selected the images and opened them as layers in Photoshop. In Photoshop I stacked them with the longest exposure on the bottom up to the shortest exposure on top. I then started with the top image and put a layer mask on it and selected only the very brightest parts of the image which was mainly the sun and high part of the sky. With the next image I selected more of brighter tones in the image, and even more with the third. I didn’t have to mask the bottom layer as it would only be visible where the masks above it intersected. Below are the masked images. Whatever is below the mask is visible in the final image.


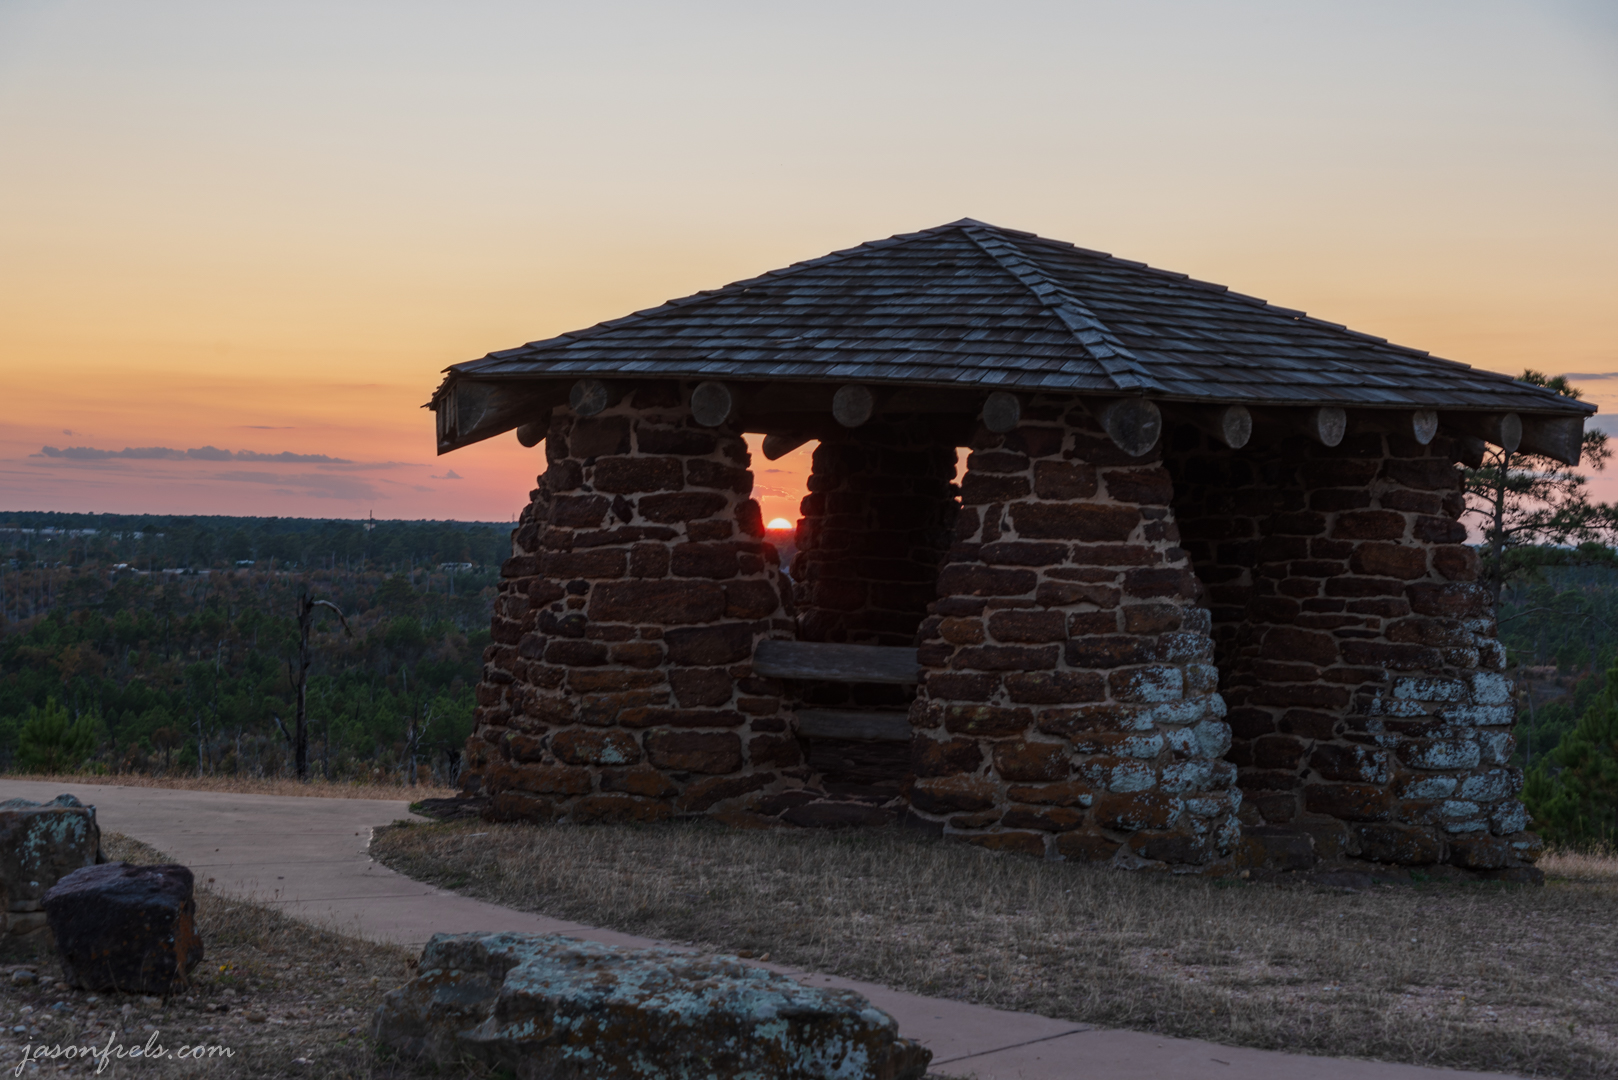 Bastrop State Park Gazebo at Sunset
You could do this with a single exposure that didn’t over-expose the sky, but the darker parts of the image will be noisy when you bring up the exposure on them. With this process, the darker areas are quite clean. I also got rid of the ugly lens flare that was right in the middle of the gazebo.
This was much more tedious that just hitting the HDR function in Lightroom, but maybe it gives you a more realistic image to edit as HDR can easily look very fake and over saturated. Also, sometimes an HDR merge can leave odd looking edges of objects in the image. You can control this when merging them manually by dithering the edges of the masks.
I did this process to another set of images and have put the HDR merge and my Photoshop layer masks merge below for comparison.


Thanks for reading. Leave a comment below if you like.

Overbaked maybe, but it seems you get more yellow sky in the photo at the left. So even if that’s the HDR image, that’s the one I prefer. But I’m a rebel. I guess I have no taste in good photography.
LikeLiked by 1 person
Everyone has their own ideas. You have excellent taste in donkeys, so I’ll give you some credit.
LikeLiked by 2 people
Thanks. I know a nice ass when I see one.
LikeLiked by 1 person
Oooh I might have just banged my head on the steering wheel! Was reading before I got out of the car. I guess the day has officially begun now! 😛
LikeLiked by 2 people
That sounds painful. I hope you have insurance.
LikeLiked by 1 person
That’s no way to treat a gold car.
LikeLike
Haha! My gold car is still without a scratch!
LikeLike
Except for the steering wheel.
LikeLiked by 1 person
Ummm….how hard exactly do you think my head is? The steering wheel is fine. 🙂
LikeLike
Tedious work is something I am not good at, fortunately you are! The last shot of the gazebo is my favorite, though the first one I like too. The orange glow gives a slightly eerie feeling. 🙂
LikeLiked by 1 person
All that tedious work and I forgot to straighten the picture a little.
LikeLiked by 1 person
LOL! I think you can be excused for that!
LikeLike