
This time of year I struggle with having time and a place to go shoot photos as the wildflowers are gone and the summer heat is oppressive. But, I have been carrying a camera and one lens at a time with me on my morning walks through a large park near my neighborhood just to keep me in practice of looking for shots. The park has a central wooded area of oaks and junipers with several little trails criss-crossing the area under the low hanging branches. One morning while walking the trails and ducking beneath the branches, I spied a prickly pear cactus catching a few beams of dappled morning sunlight and set about framing that up.
The lens I had on this morning was a 30mm on my crop-sensor Z50, which gives me a field of view equivalent to about 45mm on a full-frame camera. I got down kind of low to get level with the cactus and tried shooting it with a few different aperture settings to see what I liked best. The aperture is basically the opening in the lens that lets in light. A wider or faster aperture lets in more light and allows you to use a faster shutter-speed. In addition to shutter-speed, the aperture also affect the depth of focus and you can use this to control how much of the foreground and background is in focus.
Depth of focus is what I experimented with while shooting the prickly pear. You can use two parameters to affect the depth of focus in an image, aperture as I mentioned above and subject distance. The wider the aperture and closer the subject is to the camera, the shallower the depth of focus will be. Portrait photographers use this property to blur out backgrounds and isolate the subject of their photo. I wanted to do something similar with the cactus, so I got down as close as I could to the cactus while keeping it in the frame, and used the widest aperture available, which was f/1.4. According to an app I use, this left me with a depth of field of 5 – 6 cm (a couple of inches). See the image below.
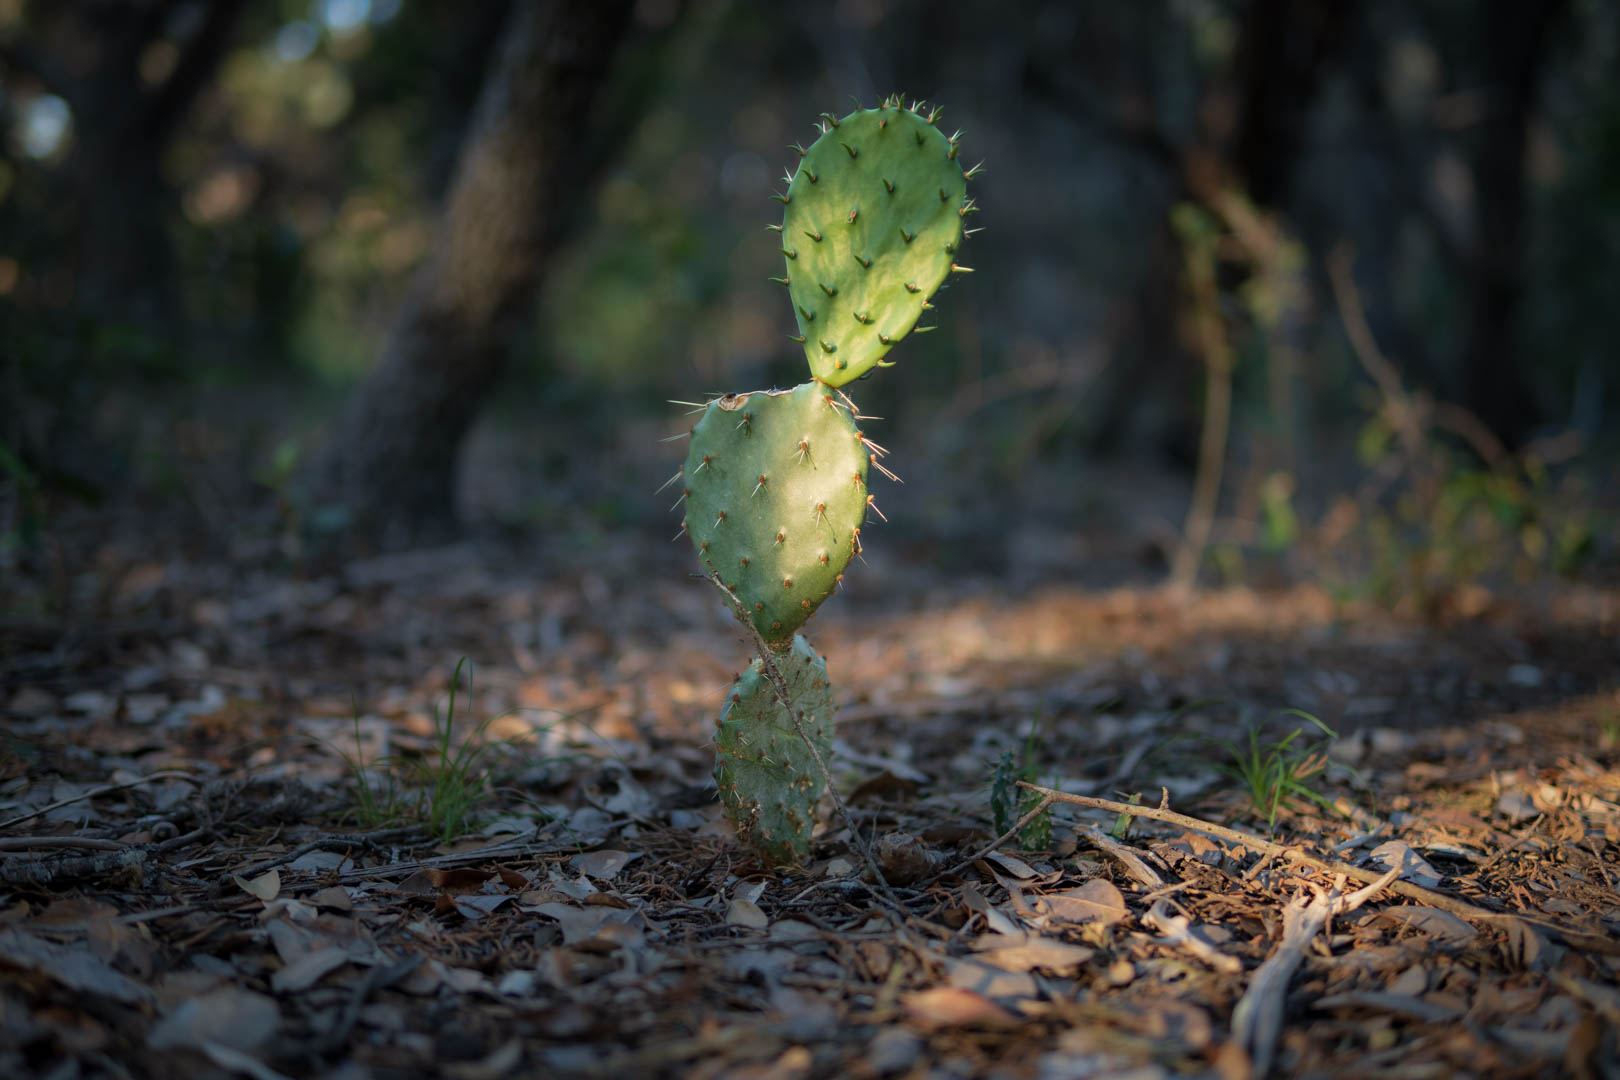
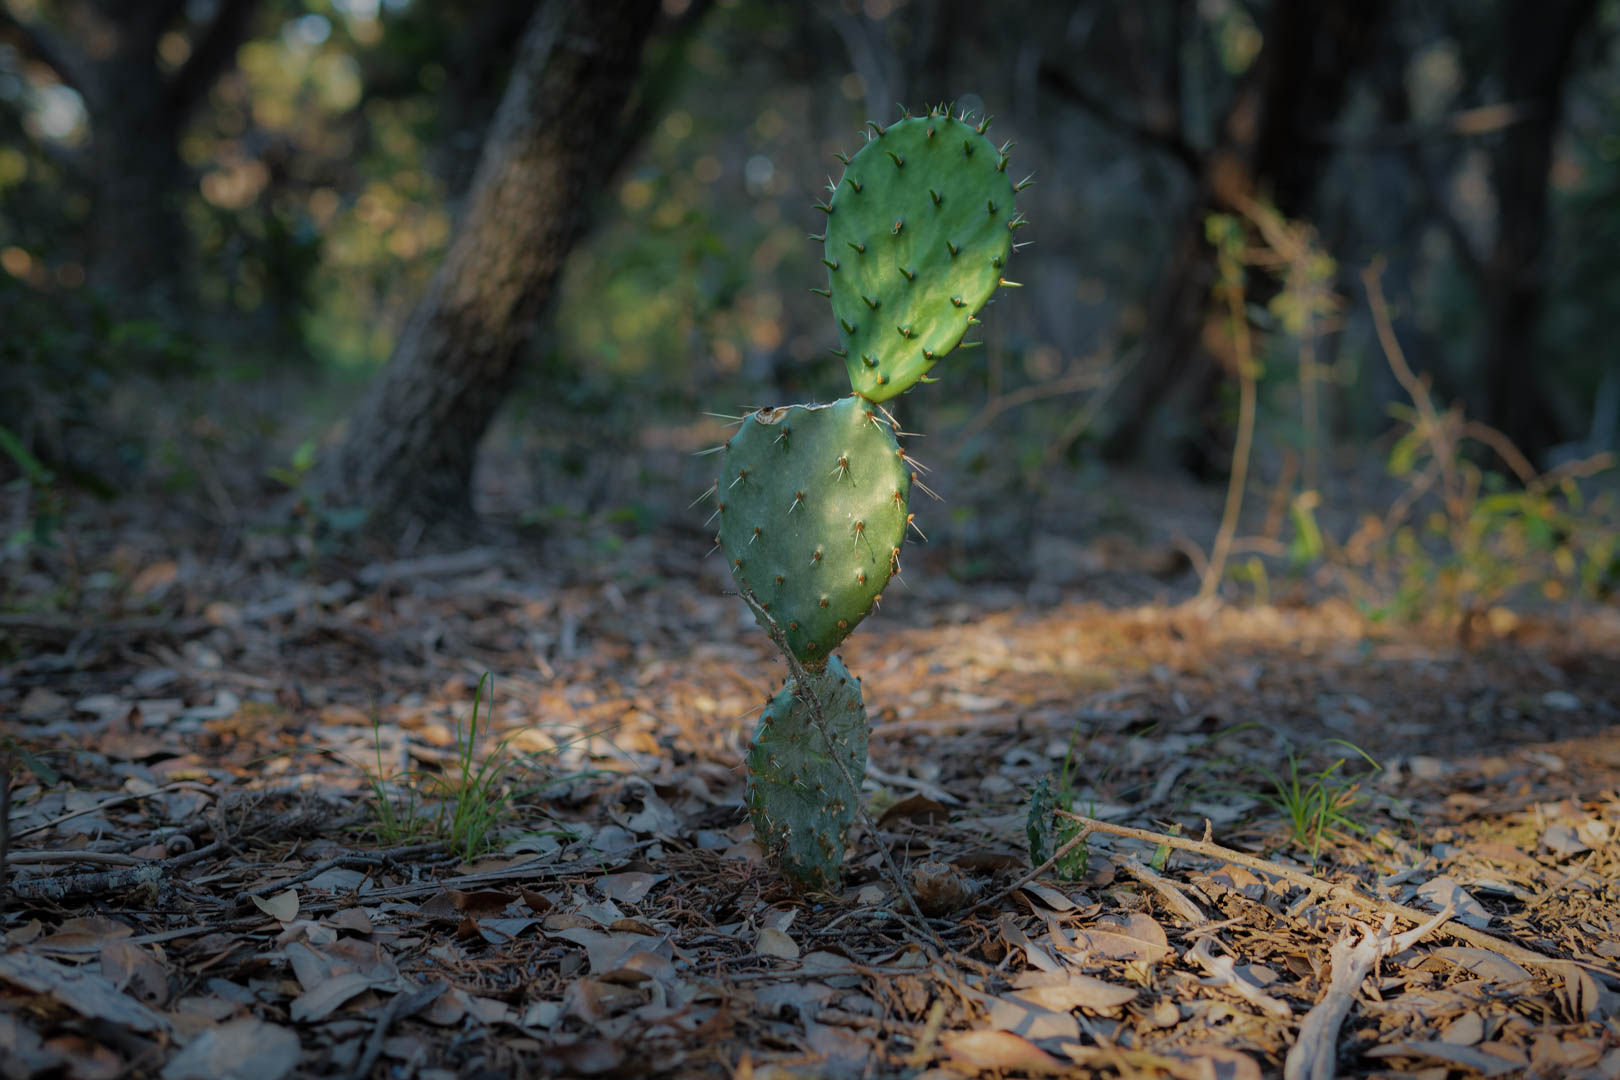
From the image above you can see that the prickly pear is in sharp focus, but the background quickly gets blurry behind the cactus, so I suppose the calculations are mostly accurate. For comparison, below is the same scene taken a few seconds later with the aperture set to f/2.8, giving me about twice the depth of field. You can see that the background tree trunk is slightly better defined.
And below you can see the focus depth change as I just moved back a couple of meters. The photo below was shot with aperture f/1.4 just like the first image, but I was much farther away from the subject so you can see that the depth of field is much deeper, about 6 times deeper than the first image.
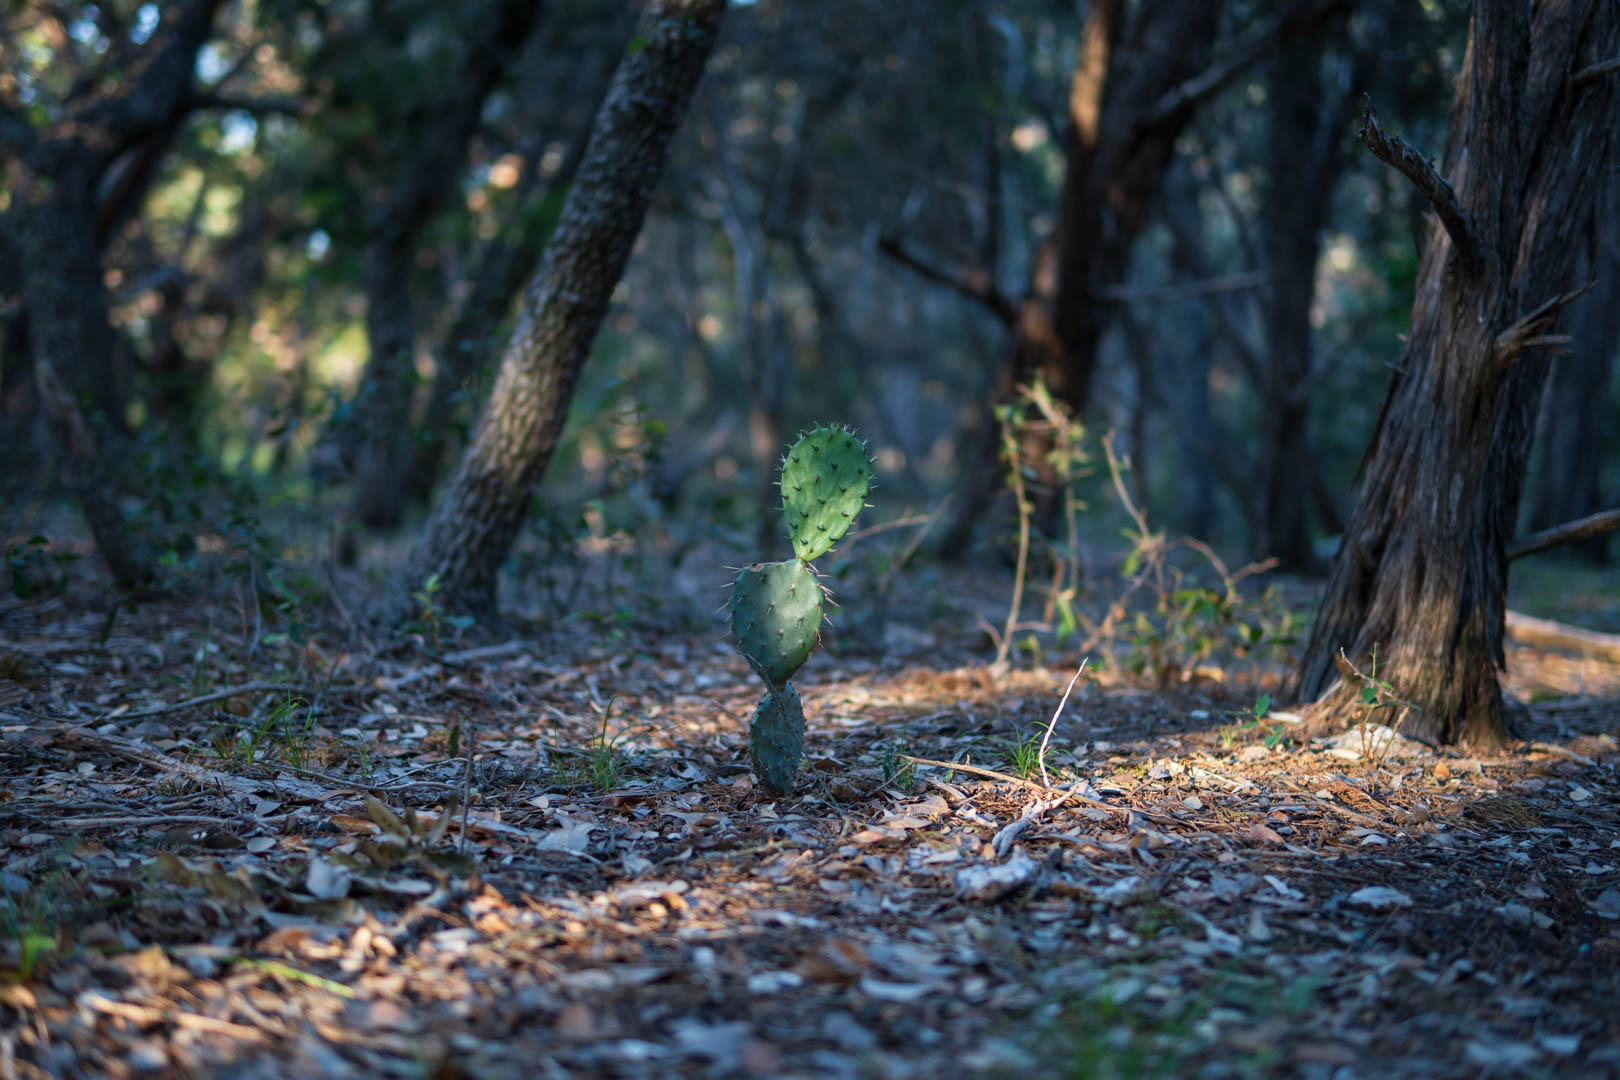
After experimenting with this, I like the first image the best as it more effectively isolates the prickly pear. You can tell it is in a dark forested setting, but the trees in the background aren’t distracting. So, if you want to get the background in your photo blurred for that bokeh effect you hear about, get as close to your subject as you can and use the fastest aperture you have.
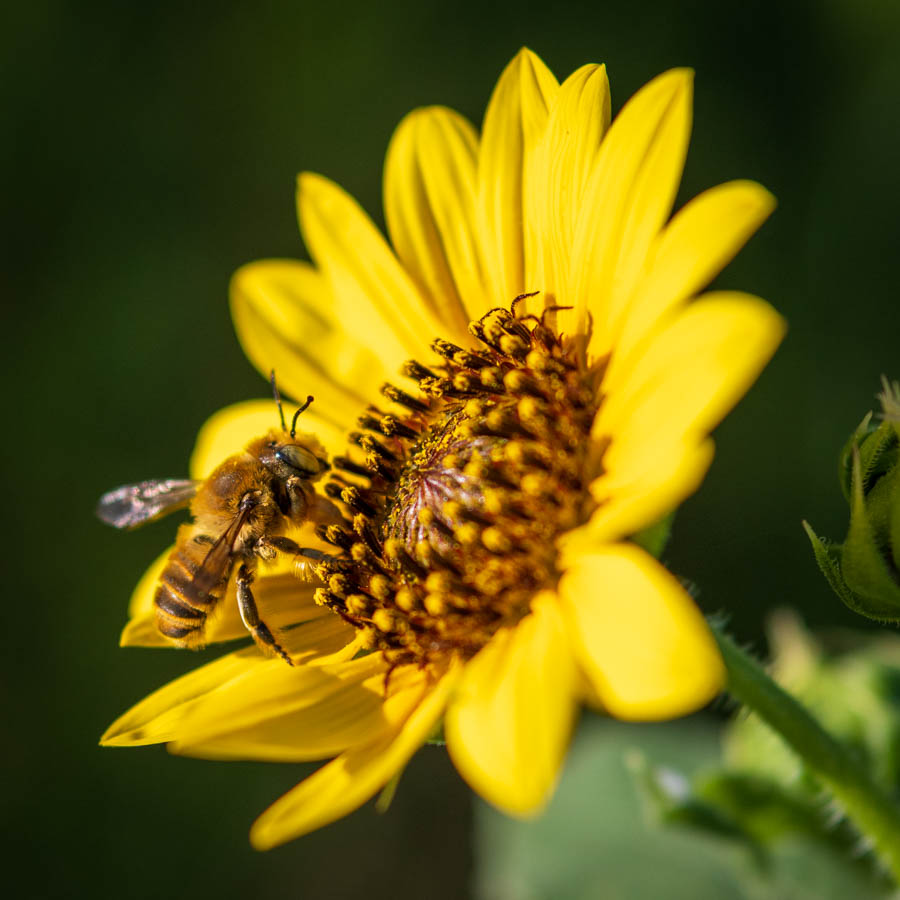
Later on, I was experimenting with some sunflowers when a bee landed right on the flower I was looking at. I had seconds to take the shot and I was already at f/2.2, so I quickly took a shot to get something and then tried to spin the aperture dial to a higher f-stop to get more focus depth, but the bee flew away. In the image below you can see that the bee’s head is in focus but the depth of focus falls off rapidly from there. Being so close at f/2.2 my focus depth was paper thin, but even if I could have gotten out to f/16 I would have had only a 2cm focus depth, not quite enough for the entire flower but certainly the bee.
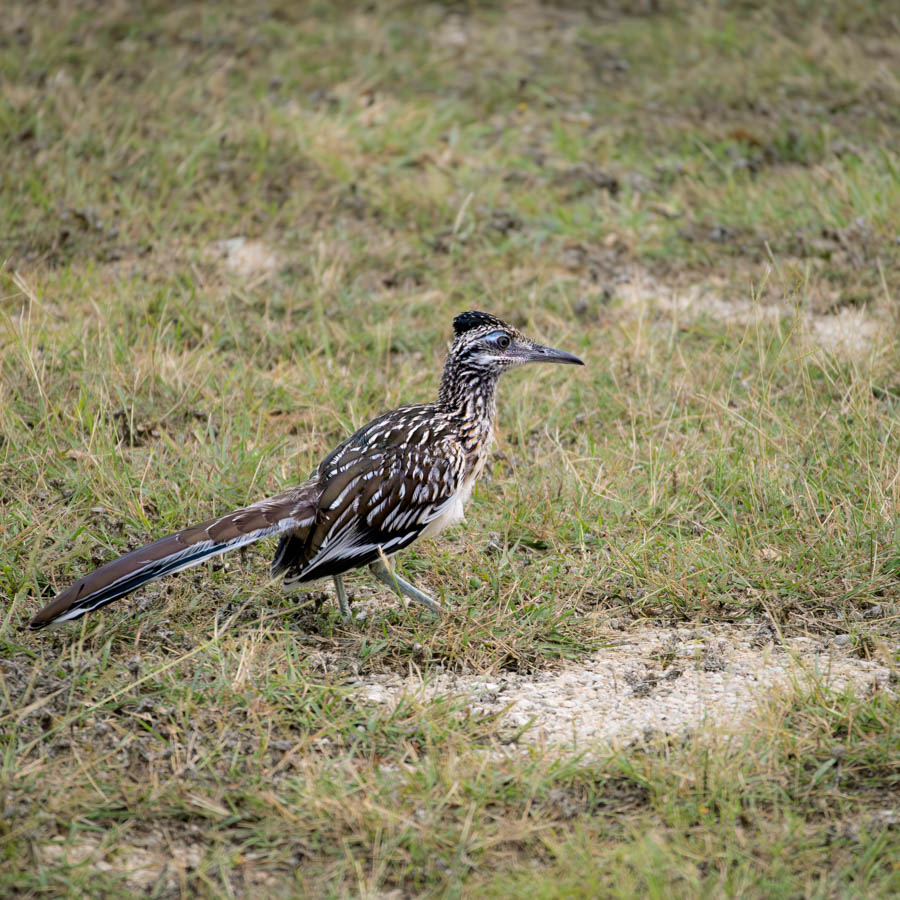
And lastly, I have a roadrunner that I followed around the park previous week trying to get a good photo. I had my zoom lens on this day and was able to just about fill the frame with the bird. I got down low, zoomed in as far as I could go 250mm, and use the widest aperture I could (f/6.3) as it was getting dark and I needed as much light as possible. Not a bad result and is the first photo I have of a greater roadrunner.
So that’s a little bit about controlling depth of field in an image using aperture and focus distance and how I am trying to keep finding subjects to shoot on these long summer days. Thanks for reading.

Love the bee on the sunflower. Great shot!
I also like the 1st shot of the prickly pear the best and now I understand more of what aperture means.
Glad to see a roadrunner up close, so yes, keep carrying your camera. 🙂
LikeLiked by 2 people
Fortunately there wasn’t a coyote chasing the roadrunner around so I had a chance to shoot it.
LikeLiked by 2 people
Haha! Though if you could have caught shots of a chase going on that may have been exciting.
LikeLiked by 1 person
Ah yes, I was wondering if the little guy looked over at you all this time and said “Wiley, good to see you again.” Before jetting off into thndistance. 🤓😏😉
LikeLiked by 2 people
I actually liked the second one more than the first of the prickly pear cactus. But, I’m not saying I disliked the first. I like trees, so I think that was affecting my choice.
LikeLiked by 1 person
The bee shot is definitely my favorite, but the others were pretty good too. I like your tip about getting close to the subject for a shallow depth of field. As I recall, using a zoom lens can reduce the depth also.
LikeLiked by 1 person
Yeah, using a zoom also really reduces the focus depth and the minim focusing distance usually goes way up as well. That roadrunner photo is taken at a long focal length and you can see the focus depth is pretty shallow.
LikeLiked by 1 person
Oh, I just love the little roadrunner! Great photos of all!
LikeLiked by 1 person
[…] https://jasonfrels.com/2023/06/28/how-to-control-focus-depth/ […]
LikeLike